
Thursday, December 4, 2008
Welcome!
One of the great things about green(er) photography—no traditional photography can be completely green—is that it also tends to be cheaper! Used equipment is cheaper and more green that new. Replenishing chemicals is cheaper and more green than disposing of and getting fresh ones each time. Rinsing in water in place of stop bath is cheaper and more green as well. Of course, there’s more to it that just the few things I mentioned here, and we’re going to walk you through life as a green(er) photographer. This means talking about how to set up your own developing and printing facilities, looking into the business practices of film, paper and chemical producers, discussing the longstanding relationship between environmental awareness and photography and giving you a peek into how green photography practices function in our world at Oberlin College.

Photography and Environmentalism, A History
ART AND THE ENVIRONMENT:
As nature photographer Robert Glenn Ketchum puts it so succinctly on his website: “[I] have always felt ‘compelled’ as an American artist to use [my] imagery, exhibitions, lectures and issue-directed book publishing to address the political realities of habitat protection, natural resource management and preservation of wile lands…” It is the work of wildlife and environmental activist photographers such as Robert Glenn Ketchum and Tom Blagden that has begun to re-couple our society with nature and bring environmental issues into the visual and intellectual conscience of our otherwise detached society.
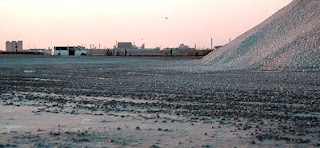
Here at Oberlin, work like that done in Julia Christensen’s “Advanced New Media: Land Arts in an Electronic Age” is bringing environmental awareness to a new level. One of the focal points of her course this semester was a trip to Gary, IN during which her students saw firsthand the abandoned landscape of a dilapidated steel-based economy. (Above, an image taken by one of her students during their trip.) Final artistic reflections included visual interpretations of land devastation, desertion and de-naturalization, but it was the students' artist statements that most spoke to the affects of the artistic process on increased environmental and landscape awareness. The final art instillations included sculpture, video and photography speaking to the power of seeing what is real: visual, video and tangible relics of an environment devastated by human development. Make sure you check out the blog from her class.
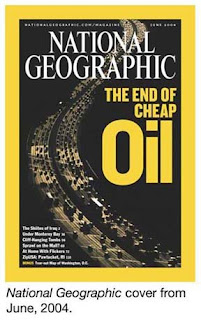
Gary Braasch’s photography very pointedly addresses issue of environmentalism as well. His work focusing on environmentalism, climate change and conservation has been featured in National Geographic magazine, a publication that has been at the forefront of environmental photography since the very beginning.
NATIONAL GEOGRAPHIC’S ROLE IN ENVIRONMENTAL ACTIVISM:
In 1884 first recorded photograph of a tornado was taken becoming the first visual documentation of natural disaster in action. (August 28, 1884, 22 miles SW of Howard, South Dakota.) In National Geographic’s third issue the first photograph of a natural scene was published, a photograph of Herald Island in the Atlantic ocean. This marks the beginning of National Geographic’s prolific history of bringing images of nature into the public eye.
 In 1905 National Geographic published a photo essay, for the first time allowing photos to speak for themselves. This collection of photos showed scenes of Lhasa, Tibet, but it is the broader themes of the essay that are most significant—an examination of human interaction with the natural landscape by bringing the visual experience to readers first-hand.
In 1906 the first true wildlife photography was published in National Geographic establishing their now longstanding relationship with nature photography. The magazine published and is continuing to publish work that actively re-couples society with nature battling the perpetual fragmentation of this relationship. Many firsts have marked National Geographic’s career as a publication effectively bringing the natural world back into the American home.
The next big milestone amongst these numerous firsts was in 1946 when images of Earth taken from space were first published. The photos ran in newspaper and magazine publications across the country, for the first time providing human society with an image of our finite earth, bringing to visual consciousness the notion of Earth as a limited resource.
CONTEMPORARY MEDIA, MOVING BEYOND:
Today internet communities continue this work in an ever more accessible manner through online blogs and the like. EarthFirst.com is an online news community that traffics in popular, tabloid style articles with some mission and class. The website talks about real issues while also covering the green work of celebrities and sharing goofier stories as well like one recently about a puppy who was born with his fur tinted green. Here, photos bring readers to what is real showing pictures of beautiful natural scenes, green projects and philanthropist celebrities. BlueEarth.org is a more directed example of the intersection of photography and environmentalism and functions under the motto “photography that makes a difference” speaking to the power of photography to affect change. The historical link between photography and environmental (and social!) activism is being carried through with new technologies while also justifying the environmental ramifications of traditional photography.
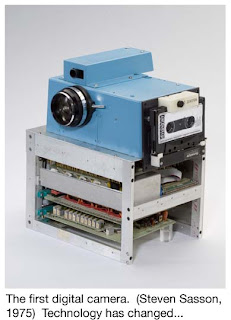 Today, digital photography is more popular than traditional photography with one common argument being the environmental benefits of a silver and chemical free process. On the other side of the argument we must consider the realities of sustainability in working with such quickly changing technology. How does buying a new digital camera every few years compare with responsible management of the chemical process? At this point we do not have a way to really measure this, but it is interesting to think about. This and the added value of holding onto a beautiful art form (for us anyways!) justify practicing traditional photography in the greenest way possible.
As nature photographer Robert Glenn Ketchum puts it so succinctly on his website: “[I] have always felt ‘compelled’ as an American artist to use [my] imagery, exhibitions, lectures and issue-directed book publishing to address the political realities of habitat protection, natural resource management and preservation of wile lands…” It is the work of wildlife and environmental activist photographers such as Robert Glenn Ketchum and Tom Blagden that has begun to re-couple our society with nature and bring environmental issues into the visual and intellectual conscience of our otherwise detached society.

Here at Oberlin, work like that done in Julia Christensen’s “Advanced New Media: Land Arts in an Electronic Age” is bringing environmental awareness to a new level. One of the focal points of her course this semester was a trip to Gary, IN during which her students saw firsthand the abandoned landscape of a dilapidated steel-based economy. (Above, an image taken by one of her students during their trip.) Final artistic reflections included visual interpretations of land devastation, desertion and de-naturalization, but it was the students' artist statements that most spoke to the affects of the artistic process on increased environmental and landscape awareness. The final art instillations included sculpture, video and photography speaking to the power of seeing what is real: visual, video and tangible relics of an environment devastated by human development. Make sure you check out the blog from her class.
Gary Braasch’s photography very pointedly addresses issue of environmentalism as well. His work focusing on environmentalism, climate change and conservation has been featured in National Geographic magazine, a publication that has been at the forefront of environmental photography since the very beginning.
NATIONAL GEOGRAPHIC’S ROLE IN ENVIRONMENTAL ACTIVISM:
In 1884 first recorded photograph of a tornado was taken becoming the first visual documentation of natural disaster in action. (August 28, 1884, 22 miles SW of Howard, South Dakota.) In National Geographic’s third issue the first photograph of a natural scene was published, a photograph of Herald Island in the Atlantic ocean. This marks the beginning of National Geographic’s prolific history of bringing images of nature into the public eye.
 In 1905 National Geographic published a photo essay, for the first time allowing photos to speak for themselves. This collection of photos showed scenes of Lhasa, Tibet, but it is the broader themes of the essay that are most significant—an examination of human interaction with the natural landscape by bringing the visual experience to readers first-hand.
In 1906 the first true wildlife photography was published in National Geographic establishing their now longstanding relationship with nature photography. The magazine published and is continuing to publish work that actively re-couples society with nature battling the perpetual fragmentation of this relationship. Many firsts have marked National Geographic’s career as a publication effectively bringing the natural world back into the American home.
The next big milestone amongst these numerous firsts was in 1946 when images of Earth taken from space were first published. The photos ran in newspaper and magazine publications across the country, for the first time providing human society with an image of our finite earth, bringing to visual consciousness the notion of Earth as a limited resource.
CONTEMPORARY MEDIA, MOVING BEYOND:
Today internet communities continue this work in an ever more accessible manner through online blogs and the like. EarthFirst.com is an online news community that traffics in popular, tabloid style articles with some mission and class. The website talks about real issues while also covering the green work of celebrities and sharing goofier stories as well like one recently about a puppy who was born with his fur tinted green. Here, photos bring readers to what is real showing pictures of beautiful natural scenes, green projects and philanthropist celebrities. BlueEarth.org is a more directed example of the intersection of photography and environmentalism and functions under the motto “photography that makes a difference” speaking to the power of photography to affect change. The historical link between photography and environmental (and social!) activism is being carried through with new technologies while also justifying the environmental ramifications of traditional photography.
 Today, digital photography is more popular than traditional photography with one common argument being the environmental benefits of a silver and chemical free process. On the other side of the argument we must consider the realities of sustainability in working with such quickly changing technology. How does buying a new digital camera every few years compare with responsible management of the chemical process? At this point we do not have a way to really measure this, but it is interesting to think about. This and the added value of holding onto a beautiful art form (for us anyways!) justify practicing traditional photography in the greenest way possible.
Wednesday, November 12, 2008
USED vs. NEW
One simple way that you can “green” your darkroom is by purchasing used equipment. Choosing used equipment reuses products that already exist instead of extracting raw materials to produce a product. Too many perfectly useable items are thrown out, replaced by a new version of the exact same item. This creates a ludicrous amount of waste can be greatly reduced by buying used equipment.
Used vs. New—a used way to live your life. I highly recommend checking out ACE Camera Web Services as your first stop in shopping for used photography equipment. This website is well maintained, constantly updated, and has been highly accredited for over the course of its 12 years of operation. They have a list of over 60 retailers across the United States, and over 30 across England, which sells every type of used photography equipment that you would ever want or need. This list ranges from used adjustable easels to used enlargers. Check out a few of the retailers that are the closest to where you live. Buying from a more local retailer is an eco-conscious choice you can make. When you buy local you will make sure that your equipment has not traveled long distances to get to your darkroom. Shipping a 10-pound package 3,465 miles (the distance from NYC to London) emitts 56 lbs of carbon into the atmosphere. Buying from a local retailer listed on ACE Camera will prevent all of that extra carbon from being directly emitted in to the stratosphere.
If none of the retailers on ACE meet your needs you can always head to B&H Photo Video for both used camera equipment and used darkroom equipment. I have personally bought a used SLR and Digital SLR from them, which were in great condition, for amazing prices. B&H has a super store in NYC, but the best place to look is online. They have all types of used equipment, not only for photography. Again the shipping is a huge problem so if you live in the city, walk there or take public transportation, and if not, choose ground shipping!
B&H also sells almost all equipment you need on the processing side, already used. What is for sale is limited to what people have sold them so they might not have everything you need.
If you must order your equipment from a far away place try contacting the retailer and asking if they can ship your package with the shipping company First Global Xpress (FGX). They are a new shipping company that has figure out a way to cut the carbon emissions of a package by 30%. By avoiding the traditional hub-and-spoke method of shipping used by companies such as UPS, FedEx and DHL, FGX has cut the shipping time, cost and carbon emissions of a single package. Just make sure to check FGX’s website because the locations they provide service between is restrictive.
So here is my advice for purchasing the most environmentally friendly photography equipment: buy used, buy local.
Tuesday, November 11, 2008
Choosing Film
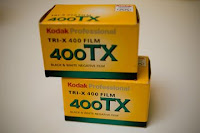
Choosing your film will be the next thing you do, and while it may seem a trivial matter of which brand is cheaper, we encourage you to make an informed decision. In this post, I’ll try to outline some major film companies that have good environmental records, and that produce film locally (which minimizes shipping distance and therefore carbon emissions). Of course, factoring in quality and cost will also be a priority.
Kodak
Kodak
Pros: According to Kodak’s website, they take environmental concerns very seriously [Kodak]. They have a "Responsible Growth Message", Global Sustainability Reports, and they even have extensive information on disposal and recycling. Their commitment to the environment can be shown by their recent decision to join the Chicago Climate Challenge.
Cons: The Kodak company was involved in braking anti-pollution laws in Kodak Park in Rochester, NY. They may have cleaned up their act since, but this bears keeping in mind.
Ilford. Often the company of choice of schools.
Ilford. Often the company of choice of schools.
Pros: They aren’t as explicit on their website about a “commitment to the environment”, but they too have a section on their “environmental practices”
Cons: I couldn’t find any news about environmental impacts of Ilford.
So, really, based on the information that’s out there and what they say they do for the environment, both companies seem almost equally eco-friendly. So, good news! Keep buying the film you’ve always bought, and you should be fine.
So, really, based on the information that’s out there and what they say they do for the environment, both companies seem almost equally eco-friendly. So, good news! Keep buying the film you’ve always bought, and you should be fine.
Monday, November 10, 2008
Film Storage
Let's be clear, excess accumulation is a principle that wholly undermines the notion of sustainability, and runs contrary to all of the “green” practices we’ve compiled in this blog. That being said, no one is perfect, and mistakes are made with even the best intentions that lead circumstances where you’re stuck with more than you need! Say you’ve purchased a large stock of film that you intend to use relatively soon, but due to scheduling conflicts or other happenings in your life, it instead must be put aside for a while. While most films are manufactured to last at room temperature until their date of expiration, aging is an unavoidable problem. Because of the loss in quality caused by age and temperature related decay, many photographers will simply throw out old film, whether its before or after the expiration date! To this we say nay! There be other ways!
A common practice amongst hobbyists and professionals alike is to refrigerate film in its original packaging the moment you get it. Room-temperature storage, especially during the summer when exposure to extreme heat is most likely, can lead to the early decay of film quality. So refrigerating or freezing film can help prevent the deleterious effects of heat and age. This way instead of throwing away and wasting the unused film after its been left out, you can make sure to use every last bit of the chemically harmful material you’ve already purchased. Refrigeration is recommended for films that you intended to be use before their expiration date, and especially for all films during the hot summer months. Freezing is a more long-term solution, where if there’s a possibility the film won’t be used for years, often after expiration, then film can be preserved with relative success by storing it in a freezer. While Kodak doesn’t recommend the practice of freezing, many photographers live by it. Results vary by every stock of film, and some trial and error is necessary to divine the best solution but generally these preservative measures can be very successful in keeping your film valuable long after you purchase it.
Other suggestions: Make sure you transport and store film in the manner described usually on the packaging in which you bought it. Always avoid extreme heat (don’t leave it in the car to bake), and be mindful of its handling and exposure to light. When traveling, be sure to keep film away from security’s X-Ray scanners! This way, silly and easily avoided risks don’t destroy the valuable film you have invested in.
Some helpful links:
A nice discussion amongst the photo-community of freezing techniques-
Kodak’s recommended storage measures
Sunday, November 9, 2008
Developing: Canisters, Reels and Darkness.
Okay so you are standing in your local used photography supply shop (or website) and you decide to get the equipment you will need to develop your negatives. First stop: changing bags.
Changing bags are great, they save the hassle of building a whole light-safe changing booth. But changing bags are not a darkroom necessity; if you want to be as eco-conscious as you can be just roll your negatives on to your reel in the darkroom. As long as you make sure the safelight is turned off and the darkroom is pitch black you will be fine. But if you don’t and there is any light in the room your negatives will be ruined! This method can be considered the most eco conscious because you are not using any non-essential products (such as the changing bag) that have a carbon footprint attached to it, other than the bare necessities.
So the next thing you need to figure out is how to open the film canisters. The best way you can do this is by using two products that almost everyone has in their kitchen, a can opener and a pair or scissors. Just make sure you take extra caution when using these sharp instruments in the dark, you don’t want to cut through your film or more importantly your pinky finger.
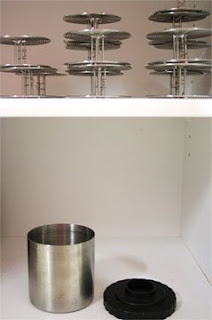
Next stop light-safe canisters and reels. You are going to be confronted with the age-old question of stainless steel or plastic. Although plastic may be cheaper I suggest springing for stainless steel. Stainless steel canisters and reels do not contain any petrochemicals, don’t crack, and last longer. If your plastic canister cracks, which it most likely will over time, you will need to buy a new one. Using stainless steel canisters and reels decreases its chances of cracking thus you will not need to buy a new one and contribute to the waste stream.
Now all you need are your chemicals. Stay tuned for an in-depth post on which are the most eco-friendly chemicals you can use.
Friday, November 7, 2008
Chemical Storage

(Above, airtight chemical storage at the Oberlin College darkroom.)
While this might seem a bit elementary, storing your photographic chemicals the correct way plays a central part in ensuring your darkroom is functioning sustainably. Careless placement of chemicals could lead to early exhaustion and end up wasting the precious solutions you’ve spent your own money on, all the while making their production and environmental footprint a total waste. The point being, do the little things to make sure you are getting the most out of what you got! None of what we’re going to tell you is new, but with those sensitive photographic chemicals, be sure to store them in lightproof and airtight containers. This means dark colored, tightly sealed jugs that look a little like this:

Exposure to air and light are both big no-no’s when it comes to conserving these solutions! Also, make sure to reuse and reuse those same plastic jugs. Essentially, you should only have to buy storage containers once in a blue moon.
Thursday, November 6, 2008
Setting Up Your Darkroom!
When it comes to setting up your darkroom you are going to want first choose a room that has no windows and where no light leaks through the doorway.  You will want to install an electric extractor fan to improve ventilation, indoor air quality and remove any gaseous fumes emitted from the chemicals. Below is a mock diagram of how your darkroom could be set up, courtesy of our friends over at Digitised. Take notice of how the dry and wet stations are separate.
For the greenest darkroom buy as much of your equipment as you can used. Refer to my earlier post on local and used shops to buy your equipment along with their bennefits.
To make sure that your darkroom is as dark as it can be I suggest blacking out windows (if there are any) and painting you walls with a black non-toxic, low odor, volatile organic compound (VOC) free paint such as The Freshaire Choice which is available at Home Depot.
A “GREEN” SAFE LIGHT:
Now it is time to get an eco-safelight. I am going to give you two options, one is expensive and relatively easy, the other is cheaper but takes some ingenuity.
 You can try the KODAK Darkroom Illuminator LED Safelight. This safe light provides twice as much visible light as conventional systems, is rated for 100,000 hours and uses1/10th the power of a standard safelight. It will run you about $160. I know this is expensive but in the long run you will save money via a reduced energy bill. If the initial investment is still too expensive you can try an alternative option.
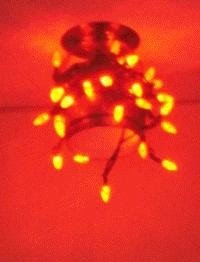
Do you love Christmas? Are you cheap? If you answered yes to at least one of the previous questions this darkroom safelight is for you. Pick up a string of red LED Christmas lights. You can string them up like shown in the picture. Just make sure to perform a safelight test. Safelight tests are simple and can tell you if your safelight is safe to use or it is going to expose you photo paper. For the test you will need to turn all lights in the darkroom off except for the safelight. Next place a coin on a small piece of photo paper. Let this sit for about 20 minutes then develop the paper. If there is an outline of the coin then your safelight is not safe.
GRADED VS. VARIABLE CONTRAST PAPER:

When it comes to adding contrast to you prints you have two options.
1. You can print on Graded photographic paper
2. You can print on Variable-Contrast photographic paper and use different number filters.
Out of the two I suggest printing on Variable-Contrast paper because it is the most eco-friendly. This way you only need to buy one set of filters and one type of paper vs no filters and 11 types of paper (one type for each filter grade). Printing with graded paper will lead to a lot of waste, both in paper waste and financial waste, seeing you may never print on some of the grades of paper you bought.
WATER WATER EVERYWHERE:
One large environmental issue with a darkroom is that there is a huge waste of water, especially if the water in the wash is constantly running. One way to wash your prints is to take an 11x14 inch, 3 inch deep, stainless steel developing tray fill it with water and submerge your print in it. Let your print sit there for 5-10 minutes. You do not have to change the water for every print you wash but I suggest that you change it frequently. By using this method you will avoid the continuous flow of water and will eliminate a lot of waste.
Another approach you can take it washing your prints with room temperature water. Your water heater expends a lot of energy heating up all of that water to wash your prints, and chances are that the energy it is using comes from coal fired power plants. In a typical year the average coal plant spews out 3,700,000 tons of carbon dioxide, 10,000 tons of sulfur dioxide, 170 pounds of mercury, and a number of other substances, which are harmful to your health and your environment. Washing your prints in water that is not hot will not only reduce your ecological impact, but it will save you a nice chuck of change on your energy bill.
 You will want to install an electric extractor fan to improve ventilation, indoor air quality and remove any gaseous fumes emitted from the chemicals. Below is a mock diagram of how your darkroom could be set up, courtesy of our friends over at Digitised. Take notice of how the dry and wet stations are separate.
For the greenest darkroom buy as much of your equipment as you can used. Refer to my earlier post on local and used shops to buy your equipment along with their bennefits.
To make sure that your darkroom is as dark as it can be I suggest blacking out windows (if there are any) and painting you walls with a black non-toxic, low odor, volatile organic compound (VOC) free paint such as The Freshaire Choice which is available at Home Depot.
A “GREEN” SAFE LIGHT:
Now it is time to get an eco-safelight. I am going to give you two options, one is expensive and relatively easy, the other is cheaper but takes some ingenuity.
 You can try the KODAK Darkroom Illuminator LED Safelight. This safe light provides twice as much visible light as conventional systems, is rated for 100,000 hours and uses1/10th the power of a standard safelight. It will run you about $160. I know this is expensive but in the long run you will save money via a reduced energy bill. If the initial investment is still too expensive you can try an alternative option.
Do you love Christmas? Are you cheap? If you answered yes to at least one of the previous questions this darkroom safelight is for you. Pick up a string of red LED Christmas lights. You can string them up like shown in the picture. Just make sure to perform a safelight test. Safelight tests are simple and can tell you if your safelight is safe to use or it is going to expose you photo paper. For the test you will need to turn all lights in the darkroom off except for the safelight. Next place a coin on a small piece of photo paper. Let this sit for about 20 minutes then develop the paper. If there is an outline of the coin then your safelight is not safe.
GRADED VS. VARIABLE CONTRAST PAPER:

When it comes to adding contrast to you prints you have two options.
1. You can print on Graded photographic paper
2. You can print on Variable-Contrast photographic paper and use different number filters.
Out of the two I suggest printing on Variable-Contrast paper because it is the most eco-friendly. This way you only need to buy one set of filters and one type of paper vs no filters and 11 types of paper (one type for each filter grade). Printing with graded paper will lead to a lot of waste, both in paper waste and financial waste, seeing you may never print on some of the grades of paper you bought.
WATER WATER EVERYWHERE:
One large environmental issue with a darkroom is that there is a huge waste of water, especially if the water in the wash is constantly running. One way to wash your prints is to take an 11x14 inch, 3 inch deep, stainless steel developing tray fill it with water and submerge your print in it. Let your print sit there for 5-10 minutes. You do not have to change the water for every print you wash but I suggest that you change it frequently. By using this method you will avoid the continuous flow of water and will eliminate a lot of waste.
Another approach you can take it washing your prints with room temperature water. Your water heater expends a lot of energy heating up all of that water to wash your prints, and chances are that the energy it is using comes from coal fired power plants. In a typical year the average coal plant spews out 3,700,000 tons of carbon dioxide, 10,000 tons of sulfur dioxide, 170 pounds of mercury, and a number of other substances, which are harmful to your health and your environment. Washing your prints in water that is not hot will not only reduce your ecological impact, but it will save you a nice chuck of change on your energy bill.
Wednesday, November 5, 2008
Printing Paper
When it comes down to choosing which kind of paper to develop on, there doesn’t seem to be a clearly sustainable choice between RC (Resin-coated) and Fiber based papers. The pro’s and con’s of these papers will be discussed later but no matter which one you choose, using test strips can ensure that you make the most efficient and effective use of your paper. Test strips are handy in figuring out the ideal conditions and timing for each stage of the development process. This way you don’t have to waste full sheets of paper alongside chemical solutions through some sort of guess and check system. See below for some helpful links on making and using test strips.
Now, in choosing between RC and Fiber based paper, one must carefully weigh the advantages and disadvantages accordingly. Resin Coated papers, commonly preferred by hobbyists and amateurs, require less time in each stage of the development process and are generally easier to work with. But while the lesser amount of developing time means more conservation of chemicals and materials, the paper itself is composed of polyethylene (plastic) layers, whose production is contingent upon petroleum based sources. Furthermore, in comparison to fiber based paper, resin coated prints have a much shorter life span. Fiber based prints on the other hand, are the preferred choice by many professionals and serious artists due to the longevity and tonal range of the final product. In the development process, fiber based paper requires a much longer time in each stage as compared to RC, and while this means greater consumption of photochemical solutions and materials, many users will claim that the longer time affords for greater control of tone, tint and contrast. In addition, the end result is proven to last for a great deal longer, some claim up to 500 years, than resin-coated alternatives. At this point it becomes hard to judge which paper really contains more sustainable properties, as longevity is pitted against current resource consumption. Thus, the decision is up to you. Which paper best suits your needs in pursuing photographic pleasure?
Now, in choosing between RC and Fiber based paper, one must carefully weigh the advantages and disadvantages accordingly. Resin Coated papers, commonly preferred by hobbyists and amateurs, require less time in each stage of the development process and are generally easier to work with. But while the lesser amount of developing time means more conservation of chemicals and materials, the paper itself is composed of polyethylene (plastic) layers, whose production is contingent upon petroleum based sources. Furthermore, in comparison to fiber based paper, resin coated prints have a much shorter life span. Fiber based prints on the other hand, are the preferred choice by many professionals and serious artists due to the longevity and tonal range of the final product. In the development process, fiber based paper requires a much longer time in each stage as compared to RC, and while this means greater consumption of photochemical solutions and materials, many users will claim that the longer time affords for greater control of tone, tint and contrast. In addition, the end result is proven to last for a great deal longer, some claim up to 500 years, than resin-coated alternatives. At this point it becomes hard to judge which paper really contains more sustainable properties, as longevity is pitted against current resource consumption. Thus, the decision is up to you. Which paper best suits your needs in pursuing photographic pleasure?
---------
How to make test strips and then, how to use them.
Tuesday, November 4, 2008
Chemicals for Print Development
As you might have guessed after spending a day in the dark room inhaling them, the chemicals used in photography are hardly friendly. Silver halide photography (pretty much the universal type of photography today) traditionally uses some pretty nasty chemicals. Developers, for instance, are generally combinations of hydroquinone and metol (metolquinone or M-Q developers) or hydroquinone and phenodine (P-Q developers). Hydroquinone is very toxic, and a suspected carcinogen. Prolonged exposure to hydroquinone causes fairly significant ocular damage. Metol is moderately toxic by skin or eye contact, or inhalation, and toxic by ingestion. Phenidone has similar toxicity levels.
They aren’t especially friendly to the environment, either. Irresponsible dumping of chemicals can cause lots of unwanted pollution. Remember, some of these chemicals are highly toxic. Replenisher can be used to prolong the lifespan of your chemicals. But once you need to get rid of them, do so responsibly. A great website with information on proper disposal of chemicals can be found here. Also, just dumping your unwanted prints and film isn’t good for the environment either, because of the high silver content of developed film and prints (those of you who know the chemistry of photography understand why this is).

Luckily for us, someone out there knew there’d be a market for “greener” chemicals. The company Silvergrain has effective developers, stop baths, and fixers. Four of the more toxic chemicals used in typical photography have been replaced in Silvergrain’s solutions. You can read more about it here; it sounds pretty promising. There's a discussion on replacing more harmful chemicals with these chemicals on photo.net here. The chemicals can be purchased here. On an environmental note, though, these chemicals are not sold in powder form, meaning they’ll use more fossil fuels to ship.
But what if I still want to buy my favorite chemicals? First of all, be sure to buy powdered and buy in bulk if you can!
Another good way to be “greener” (and save some money) is to use a water rinse instead of stop bath. This has the same effect as acid-based stop bath solutions, though it takes a bit longer. Why the same effect? The whole idea behind stop bath is stopping the reaction that goes on when film is exposed to developer. Neutralizing this alkaline (basic) reaction requires a non-basic wash, and for a long time that has meant using an acidic wash. Water, though, should have a neutral pH (check pH in your area, a more basic pH will take longer to neutralize the reaction) and thus be pretty much just as effective at stopping the reaction. A website I found tests this theory and finds the stopping time is extremely similar for both water and acid stop bath.
Health note: Because of the toxic nature of the traditional chemicals, good ventilation in your darkroom is key. The important thing is that there be airflow, across the floor and into an exhaust system, because you need to replace the air taken out by the exhaust system. This exhaust system should be close to where you’re using the chemicals, so it takes up the vapors. Ceiling-mounted vents don't really do much besides make noise. Hoods placed well above the chemical area only serve to suck chemical vapors up into your lungs and are generally ineffective at removing the vapors from the room (because they're meant to suck in vapors that rise up to them, like steam, and photographic chemical vapors don't do that). More information on this can be found here.

The bottom line is, photography CAN be made greener, but it isn’t in the interest of large companies to do so because the market now is in digital, not in traditional film photography. It’s easiest to keep doing photography the way we always have, but now that we better understand the health and environmental effects, changes can be made to make photography greener for those of us who are concerned about the environment but interested in continuing to do traditional photography.
Monday, November 3, 2008
Chemical Disposal
After a long day of toiling in the darkroom, a common inclination is to simply flush those chemicals down the drain. This is most certainly NOT the most sustainable or safe way to go about disposing of those chemicals, and actually will end up losing you money in the long run. Thankfully, we are here to guide you through some practices that will not only save you precious money, but also ensure that the dirty little byproducts of your hobby don’t end up harmfully impacting the environment!
First, get to know your facility’s drainage system. Does your facility belong to a sewage system or septic? USEPA Regulations differ for each system, thus your disposal options depend upon this entirely. In general, septic tanks do not have the ability to treat the photochemical waste you would be flushing. Luckily, there are many ways to otherwise transport your waste to a treatment plant etc. Check in your yellow pages, “google” for Hazardous Waste Collection, or bring them yourself. If you are part of a sewage system, the best method is to send them to the treatment plant via none other than the sewer. Spent developer, water used as stop bath and sepia toners are all OK to send down the drain. Fixer is NOT OK.
NOTE: Make sure that before you dispose of waste chemicals that they have been utilized to their full potential. Developer is usually good for multiple sessions, as long as stored properly (effects vary by dilution and brand). The more you reuse, the less you have to buy, and the less unnatural material you put into the environment!
Used fixer presents the largest problem in terms of disposal because after the development process, the liquid is saturated with silver ions. Silver over certain concentrations is regulated from entering the water table, as the properties of silver are such that it is toxic to aquatic wildlife. Even the amount used in a small darkroom often exceeds this concentration, and is thus illegal to flush down the drain as is, and also detrimental to the environment. Luckily, there are many ways to recover the silver from the fixer, thus conserving and recycling a valuable resource, as well as preventing any environmental damage that would be caused otherwise.
THE BEST METHODS FOR SILVER EXTRACTION DEPENDS UPON THE SIZE OF YOUR DARKROOM:
For smaller in-home or school operations: For a DIY kind of procedure, pour the used fixer into an appropriately sized bucket along with some steel wool. Leave the bucket overnight. In the morning, the silver will have conglomerated into a sludge while the effluent fixer can then be flushed. The silver sludge must then be collected, stored and eventually sent to a refinery to be recycled.
Another, slightly less intensive option is to do some research and find the closest larger photographic operation near you. Chances are that they have a system already in place to recover and perhaps refine the silver and are often willing to take your fixer for a certain percentage of the silver afterwards. Some likely culprits: large universities, hospitals, and commercial printers.
For larger commercial operations: Investment in a silvery recovery machine might be the most cost effective and easiest way to extract the silver. After recovery is complete, cartridges can then also be sent to refiners to be recycled.
Some helpful links:
Silver Profit - a leading manufacturer of silver recovery machines. Also has custom silver recovery buckets for a home operation
Kodak List of Silver Recovery – Major recovery facilities nationwide:

Sunday, November 2, 2008
Oberlin College Photography Program
.
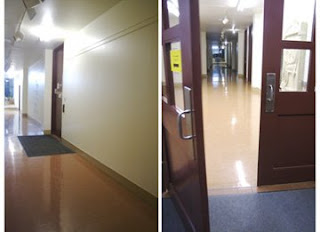
Every step of the traditional photography process in the Oberlin College darkroom is measured, conscious, clean and green(er). Metal canisters are available for printing, water is conserved and the less harmful options for chemistry are utilized. All chemistry disposal is conscious, and preservation and reuse are always sought out first. The darkroom is beautiful, clean and an exciting place to work as well! At this point, we have laid out the steps for you. We have talked about where to get equipment, which chemistry, film and paper options are available and how to set up the most eco-friendly darkroom possible. AND we have shown you many examples of Oberlin College’s darkroom and how these issues are addressed on our campus. (BELOW ARE IMAGES OF THE OBERLIN COLLEGE DARKROOM.)
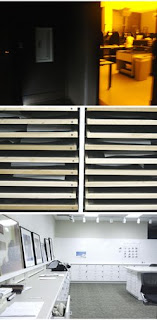
Aspects of the Oberlin College darkroom are certainly different from the darkroom we are suggesting here. At the most basic level, we have to remember that this darkroom is set up for professional quality work with the greatest resources available. We have a film drying cabinet, nice drying racks for prints, a dry mount press and flashy white critique boards. All the while, the model here for responsible darkroom work is paramount. As Professor Pipo always stresses, be mindful. Pay attention to work space, chemical use, leaving faucets on and respecting other peoples’ work. All of these suggestions preserve resources in and out of the darkroom. Being attentive to test strips, each step of development and care of the final product shows respect not only for the work done, but the resources our society uses and tends to abuse.
Saturday, November 1, 2008
Photo Cooperatives, at Oberlin and beyond...
The Oberlin photo co-operative not only puts buying power and decision making control in the hands of its members, but it allows students who are not currently enrolled in a photography course at the school to print and work on their art. Cooperative organizing is a great way to build community, save money and save resources. At Oberlin, we’re all about that!
Try organizing a photo cooperative in your area. Especially if you are in school, colleges and universities are often willing to provide the space (and sometimes even the funding!) for this sort of project. When it is an option, cooperative is the way to go. It is for sure less expensive and for sure conserves resources. As we all learned when we were little, sharing is caring! When I (Erika) was in high school I did some work at the Boston Photo Cooperative. I believe that since then this co-op has shut down, but it was an amazing resources and amazing experience! It became more than just a way to share physical resoures; I learned a huge amount from the more experienced photographers working in the space. It created a very inspiring artist collective that stretched beyond chemicals, photo paper and red lights. Think about setting up a collective like this in your community. Even if it’s just a few friends, one set up is cheaper and more sustainable than three or four.
For more information about the Oberlin Photo cooperative visit Oberlin photo cooperative. With the exception of other college photo coop structures, the best resource I have heard of is Photo Coop in New York City. If you would like to learn about cooperative philosophy visit Peacework Magazine online.
Subscribe to:
Posts (Atom)